-
Spring REST Docs 세팅기🚀카테고리 없음 2022. 8. 7. 18:22
0. intro
저희는 기존엔 API 명세를 notion을 통해 작성했습니다.
하지만 실제 코드와 연동되지 않는 점이 불편했고, API별 테스트를 통한 검증을 하고 싶었습니다.
이에 신뢰성있는 API 문서를 프론트엔드에 공유할 수 있는 REST Docs를 사용하기로 했습니다.
다음은 REST Docs 를 세팅하고 문서화 한 과정입니다.
1. build.gradle
plugins {
   id 'org.springframework.boot' version '2.7.1'
   id 'io.spring.dependency-management' version '1.0.11.RELEASE'
   id 'java'
   id "org.asciidoctor.jvm.convert" version "3.3.2"
}

group = 'com.wooteco'
version = '0.0.1-SNAPSHOT'
sourceCompatibility = '11'

configurations {
   asciidoctorExtensions // dependencies 에서 적용한 것 추가
}

repositories {
   mavenCentral()
}
ext {
   // 사용할 변수 선언
   set('snippetsDir', file("build/generated-snippets"))
}

dependencies {
   implementation 'org.springframework.boot:spring-boot-starter-data-jpa'
   implementation 'org.springframework.boot:spring-boot-starter-validation'
   implementation 'org.springframework.boot:spring-boot-starter-web'
   implementation 'org.springframework.boot:spring-boot-starter-mail'
   implementation 'com.github.ulisesbocchio:jasypt-spring-boot-starter:3.0.3'
   implementation 'com.google.guava:guava:31.0.1-jre'

   // build/generated-snippets 에 생긴 .adoc 조각들을 프로젝트 내의 .adoc 파일에서 읽어들일 수 있도록 연동
   // .adoc 파일을 HTML로 만들어 export
   asciidoctorExtensions 'org.springframework.restdocs:spring-restdocs-asciidoctor'
   compileOnly 'org.projectlombok:lombok'

   runtimeOnly 'com.h2database:h2'
   runtimeOnly 'mysql:mysql-connector-java'

   annotationProcessor 'org.projectlombok:lombok'

   testImplementation 'org.springframework.restdocs:spring-restdocs-mockmvc'

   testImplementation 'org.springframework.boot:spring-boot-starter-test'
   testImplementation 'io.rest-assured:rest-assured:4.4.0'
   testImplementation 'io.rest-assured:spring-mock-mvc:4.4.0'
   testImplementation 'org.mockito:mockito-inline:3.8.0'

   implementation 'io.jsonwebtoken:jjwt-api:0.11.5'
   runtimeOnly 'io.jsonwebtoken:jjwt-impl:0.11.5'
   runtimeOnly 'io.jsonwebtoken:jjwt-jackson:0.11.5'
}

test {
   // 위에서 작성한 snippetsDir 디렉토리를 test의 output으로 구성하는 설정
   // -> 스니펫 조각들이 build/generated-snippets로 출력
   outputs.dir snippetsDir

   // 테스트 실행
   useJUnitPlatform()
}

// asciidoctor 작업 구성
asciidoctor {
   // 위에서 작성한 configuration 적용
   configurations 'asciidoctorExtensions'

   // source가 없으면 .adoc파일을 전부 html로 만들어버림
   // source 지정시 특정 adoc만 HTML로 만든다.
   sources{
      include("**/index.adoc","**/common/*.adoc")
   }

   // 특정 .adoc에 다른 adoc 파일을 가져와서(include) 사용하고 싶을 경우 경로를 baseDir로 맞춰주는 설정
   // (개별 adoc으로 운영한다면 필요 없는 옵션)
   baseDirFollowsSourceFile()

   // snippetsDir 를 입력으로 구성
   inputs.dir snippetsDir

   // asciidoctor 전 test 실행!
   dependsOn test
}

// static/docs 폴더 비우기
asciidoctor.doFirst {
   delete file('src/main/resources/static/docs')
}

// asccidoctor 작업 이후 생성된 HTML 파일을 static/docs 로 copy
task createDocument(type: Copy) {
   dependsOn asciidoctor

   from file("build/docs/asciidoc")
   into file("src/main/resources/static")
}

// build 전 createDocument(REST Docs 문서화) 실행!
build {
   dependsOn createDocument
}
Gradle 7.4.1 버전
grovvy 문법을 정확히 알지 못해 틀린 부분이 있을 수 있습니다.
1-1. 빌드 과정
- 테스트 실행
- 테스트 결과를 build/generated-snippets에 저장
- 이전 static/index.html 비우기
- src/docs/asciidoc/index.adoc을 통해 build/docs/asciidoc/ 에 index.html 생성
- 생성된 HTML 파일을 build 에서 src/main/resources/static/로 이동한다
사실 이때 index.html 이 생성되는 주기를 언제로 할지 고민했습니다.
build 단위로 재생성을 할 시 build 시간이 길어지기 때문에, test 마다 실행 시간이 길어진다는 문제가 있었습니다.
asciidoctor 명령어를 이용해 수동 export 를 하는 방안도 고려했지만,
아직 실행 시간이 길어진 정도가 크지 않아 현재 세팅을 유지하고 있습니다.2. 테스트 코드 작성
2-1. RestAssuredMockMvc
RestAssuredMockMvc Spring의 MockMvc 위에 빌드된 REST API인 RestAssuredMockMvc 를 사용했습니다.
RestAssured 와 문법이 같고, @WebMvcTest 형태의 테스트가 가능합니다.
편한 문법으로 빠르게 테스트하기 위해 해당 API를 사용했습니다.
관련 링크
공식문서
RestAssuredMockMvc - spring-mock-mvc 2.8.0 javadoc
RestAssuredMockMvc - spring-mock-mvc 2.8.0 javadoc
Latest version of com.jayway.restassured:spring-mock-mvc https://javadoc.io/doc/com.jayway.restassured/spring-mock-mvc Current version 2.8.0 https://javadoc.io/doc/com.jayway.restassured/spring-mock-mvc/2.8.0 package-list path (used for javadoc generation
www.javadoc.io
baeldung
https://www.baeldung.com/spring-mock-mvc-rest-assured
REST-assured Support for Spring MockMvc | Baeldung
Learn how to test Spring REST controllers using the RestAssuredMockMvc API from REST-assured.
www.baeldung.com
2-2. 테스트 환경 세팅 (ControllerTest)
import static org.springframework.restdocs.mockmvc.MockMvcRestDocumentation.documentationConfiguration;
import static org.springframework.restdocs.operation.preprocess.Preprocessors.prettyPrint;

// ... 등록된 컨트롤러/ MockBean 임포트

import io.restassured.module.mockmvc.RestAssuredMockMvc;
import io.restassured.module.mockmvc.specification.MockMvcRequestSpecification;
import org.junit.jupiter.api.BeforeEach;
import org.junit.jupiter.api.extension.ExtendWith;
import org.springframework.boot.test.autoconfigure.web.servlet.WebMvcTest;
import org.springframework.boot.test.mock.mockito.MockBean;
import org.springframework.restdocs.RestDocumentationContextProvider;
import org.springframework.restdocs.RestDocumentationExtension;
import org.springframework.test.web.servlet.setup.MockMvcBuilders;
import org.springframework.web.context.WebApplicationContext;

@WebMvcTest({
        PostController.class,
        // ... 테스트할 컨트롤러 등록
})
@ExtendWith(RestDocumentationExtension.class)
public class ControllerTest {

    protected MockMvcRequestSpecification restDocs;

    @MockBean
    protected PostService postService;
    // ... MockBean 등록

    // RestDocs 세팅
    @BeforeEach
    void setRestDocs(WebApplicationContext webApplicationContext,
                     RestDocumentationContextProvider restDocumentation) {

        restDocs = RestAssuredMockMvc.given()
                .mockMvc(MockMvcBuilders.webAppContextSetup(webApplicationContext)
                        .apply(documentationConfiguration(restDocumentation)
                                .operationPreprocessors()
                                .withRequestDefaults(prettyPrint())
                                .withResponseDefaults(prettyPrint()))
                        .build())
                .log().all();
    }
}
2-3. 테스트 작성 방식
class HashtagControllerTest extends ControllerTest { // (0)

    @DisplayName("해시태그로 검색 시 없는 해시태그이면 404 반환")
    @Test
    void findPostsWithHashtags_Exception_NoHashtag() {
        // Mockito로 등록된 MockBean 세팅
        doThrow(new HashtagNotFoundException())
                .when(hashtagService) // (1)
                .findPostsWithHashtag(matches("없는태그"), any());

        // 테스트 수행
        restDocs
                .contentType(MediaType.APPLICATION_JSON_VALUE)
                .when().get("/posts?hashtag=없는태그&size=5&page=0")
                .then().log().all()
                .assertThat() // (2)
                .apply(document("search/byHashtag/fail/noHashtag")) // (3)
                .statusCode(HttpStatus.NOT_FOUND.value());
    }
(0) 위의 ControllerTest 를 상속합니다.
(1) hashtagService는 ControllerTest 에 @MockBean으로 등록되어 있습니다.
(2) 가독성을 돕는 코드. 아래 내용들을 검증합니다.
(3) build/docs/asciidoc/ 안의 해당 디렉토리에 결과 adoc 파일들이 저장됩니다.
3. AsciiDocs 작성
3-1. adoc 조각들 생성
build/generated-snippets 속 adoc 조각들 빌드하면
build/generated-snippets 폴더에
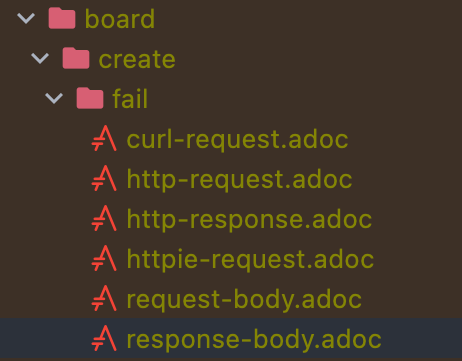
테스트에서 작성한 board/create/fail 디렉토리에 adoc 조각들이 생성되어 있습니다.
기본적으로 다음과 같은 조각들이 default로 생성됩니다.
curl-request.adoc
http-request.adoc
httpie-request.adoc
http-response.adoc
request body
response body우리는 이 중 http-request.adoc (요청) ,
http-response.adoc (응답)을 사용합니다.
이외 파일들은 사용하지 않습니다.
3-2. index.adoc 문서 작성
1) 플러그인 설치

AsciiDoc 우선 adoc 파일 작성의 편의를 위해 AsciiDoc 플러그인을 설치합니다.
해당 플러그인으로 adoc 결과물을 gui 형태로 볼 수 있고, 문법 확인도 더 간편해집니다!
2) 문서 작성

index.adoc 이제 API 문서를 adoc 형태로 작성하면 됩니다.
src/docs/asciidoc/ 디렉토리 안에 index.adoc 파일을 만들고 문서를 작성합니다.
(노가다…)
= 속닥속닥 API 명세
:doctype: book
:icons: font
:source-highlighter: highlightjs // 코드들의 하이라이팅을 highlightjs를 사용
:toc: left // Table Of Contents(목차)를 문서의 좌측에 두기
:toclevels: 2 // 목차 레벨 설정
:sectlinks:
:sectnums: // 분류별 자동으로 숫자를 달아줌
:docinfo: shared-head

== 메인페이지 // "="는 마크다운 "#"과 같은 기능

=== 메인페이지 조회
==== 성공
operation::board/find/content[snippets='http-request,http-response'] // 특정 adoc 파일 자동 임포트

//... 아래 부분들 직접 작성
이때
operation::디렉토리명[snippets=’원하는 조각들’]
를 통해 문서로 사용할 조각들을 명시해 자동으로 가져올 수 있습니다.
자세한 사용법 링크
https://narusas.github.io/2018/03/21/Asciidoc-basic.html
Asciidoc 기본 사용법
Asciidoc의 기본 문법을 설명한다
narusas.github.io
3-3. 빌드 후 index.html 생성
이제 빌드하면
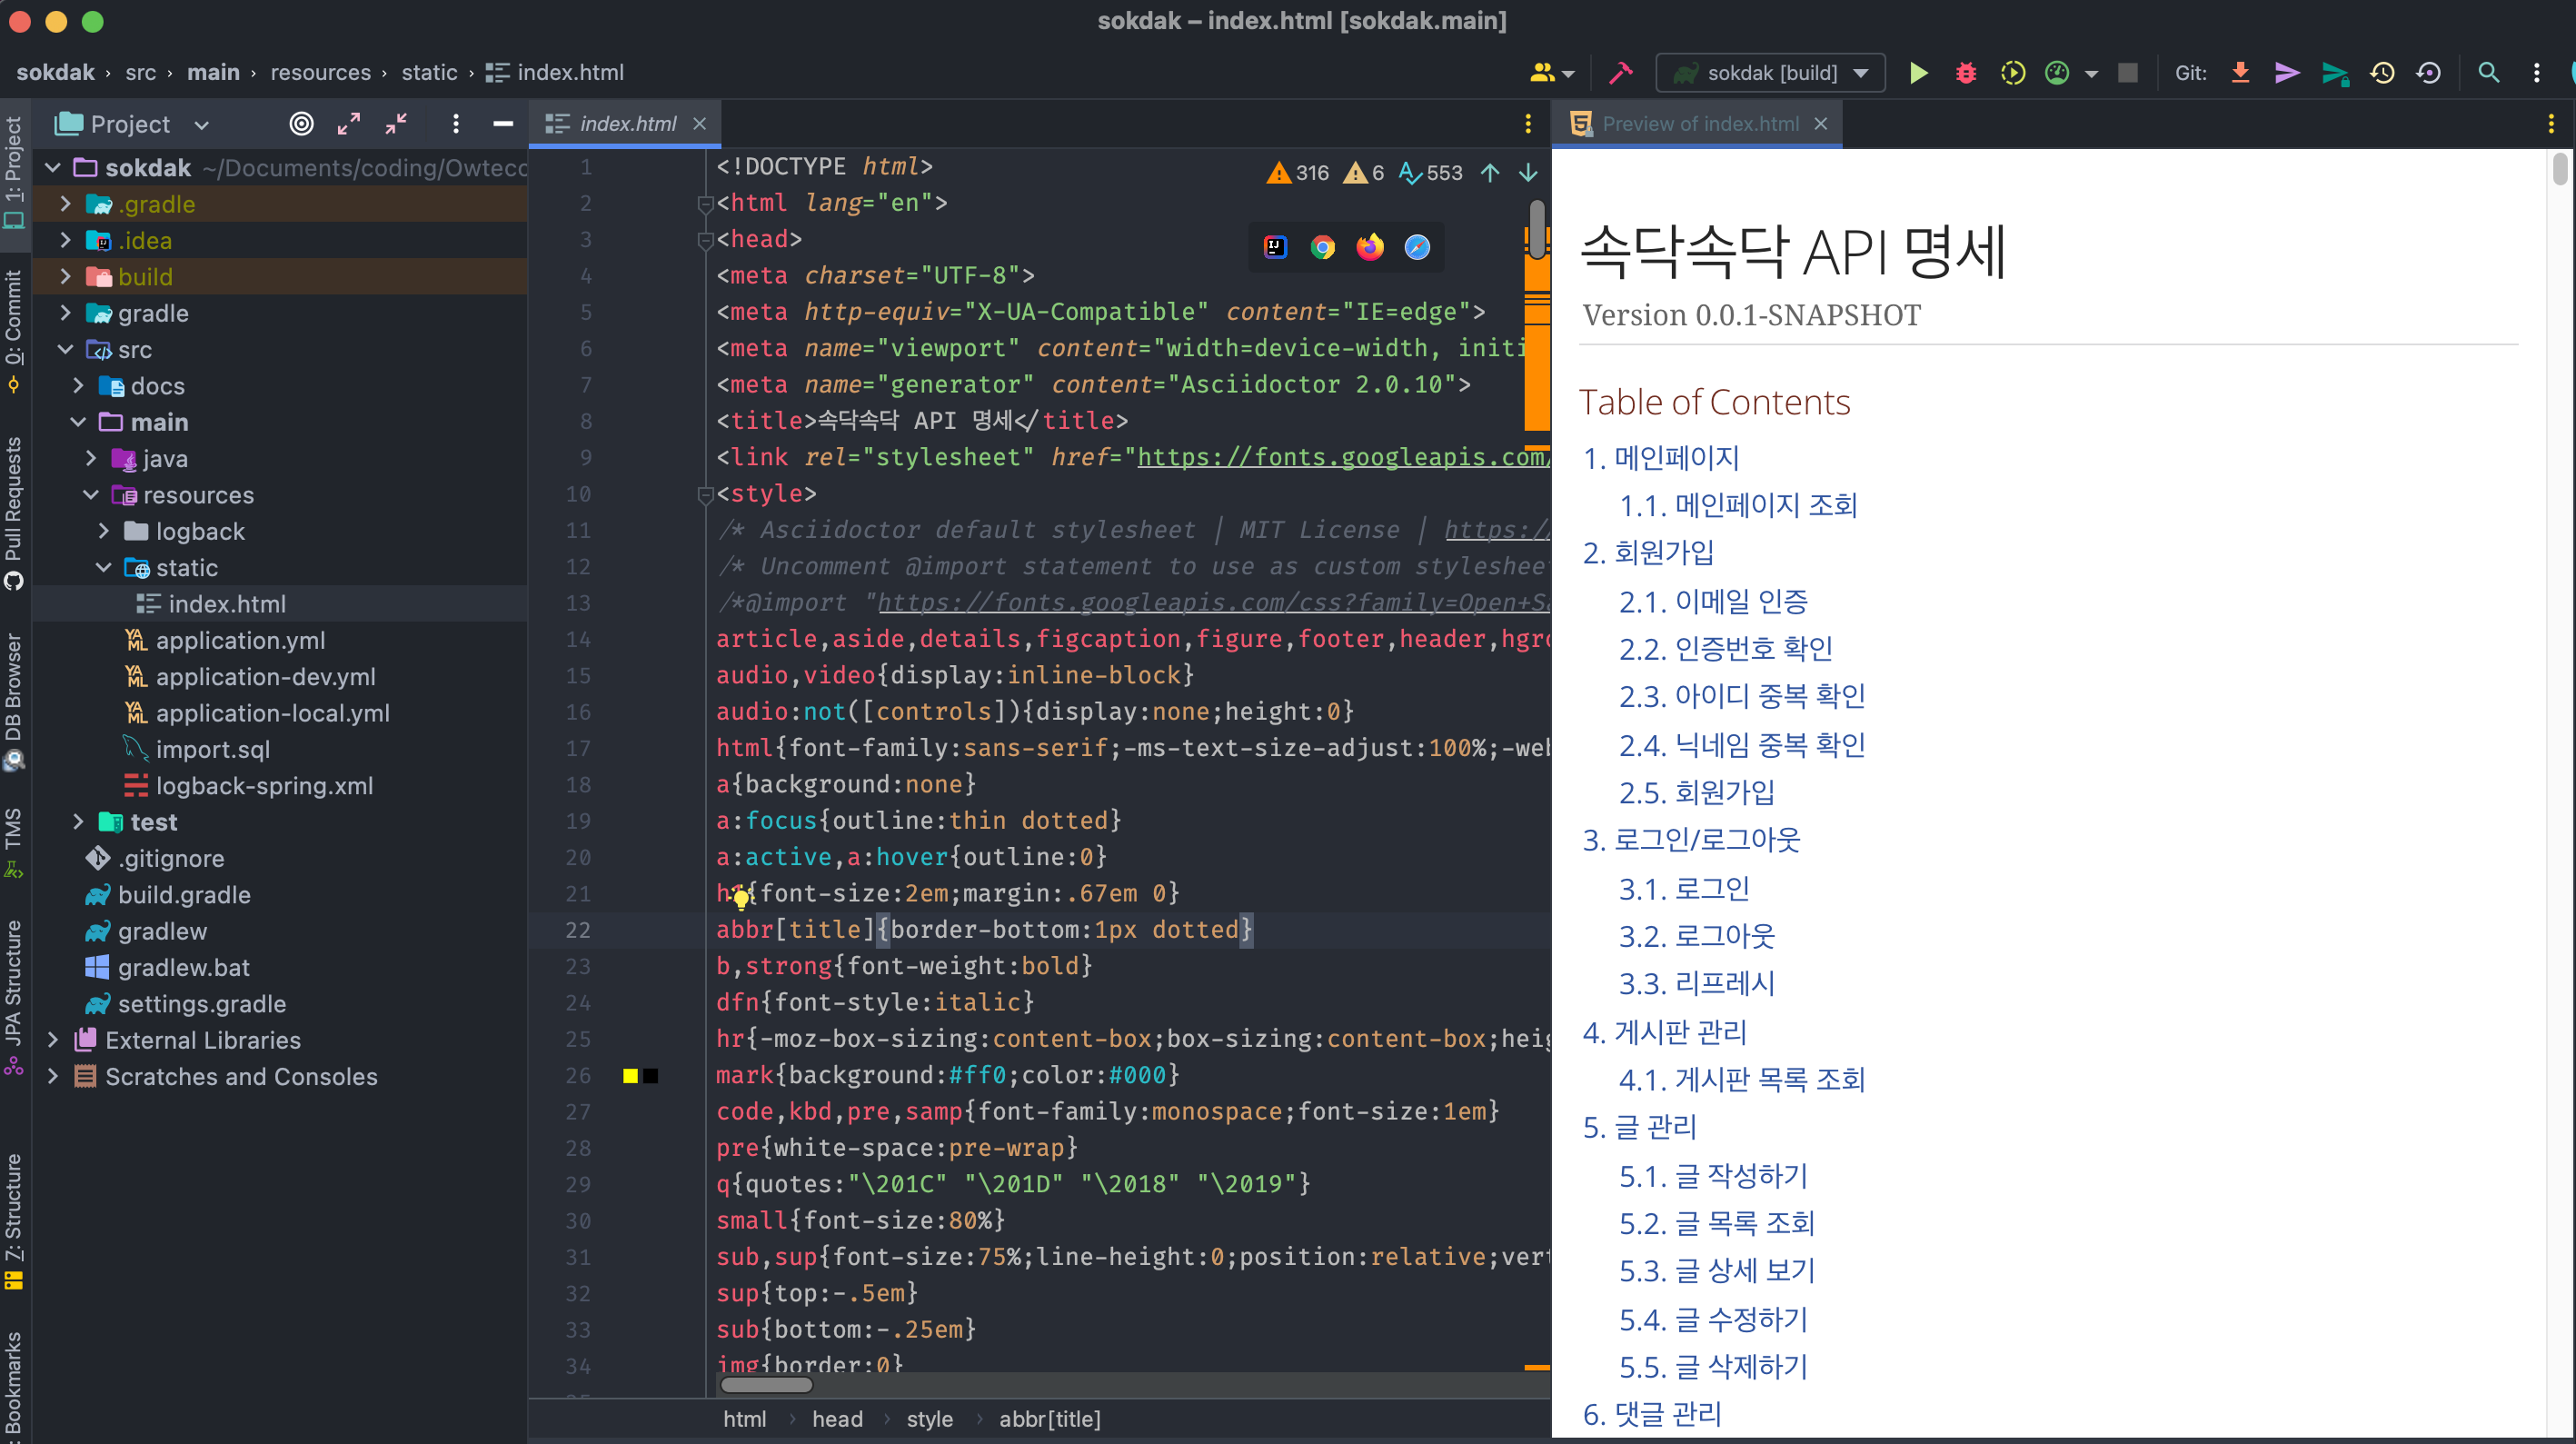
index.html 위에 작성한 index.adoc 파일이 index.html 형태로 export됩니다!
index.html 파일은
build/docs/asciidoc/index.html
src/main/resources/static/index.html두 카테고리 안에 있습니다.
( build.gradle 의 createDocument 명령어로 복사했습니다.)
이중 저희가 웹 상에 보여줄 문서는 src/main/resources/static/ 안에 위치해 있습니다.
문서 링크
1) 깃허브 push
이제 src/main/resources/static/index.html 파일을 pr을 날려
깃허브 레포에 병합합니다.
2) README.md에 링크 추가
## 속닥속닥 [RESTDocs 로 구현된 API 명세](backend/sokdak/src/main/resources/static/index.html)README.md에 링크를 남겨주시면

깃허브 메인화면 다음과 같이 index.html에 접근 가능합니다.
3) Github Pages 설정
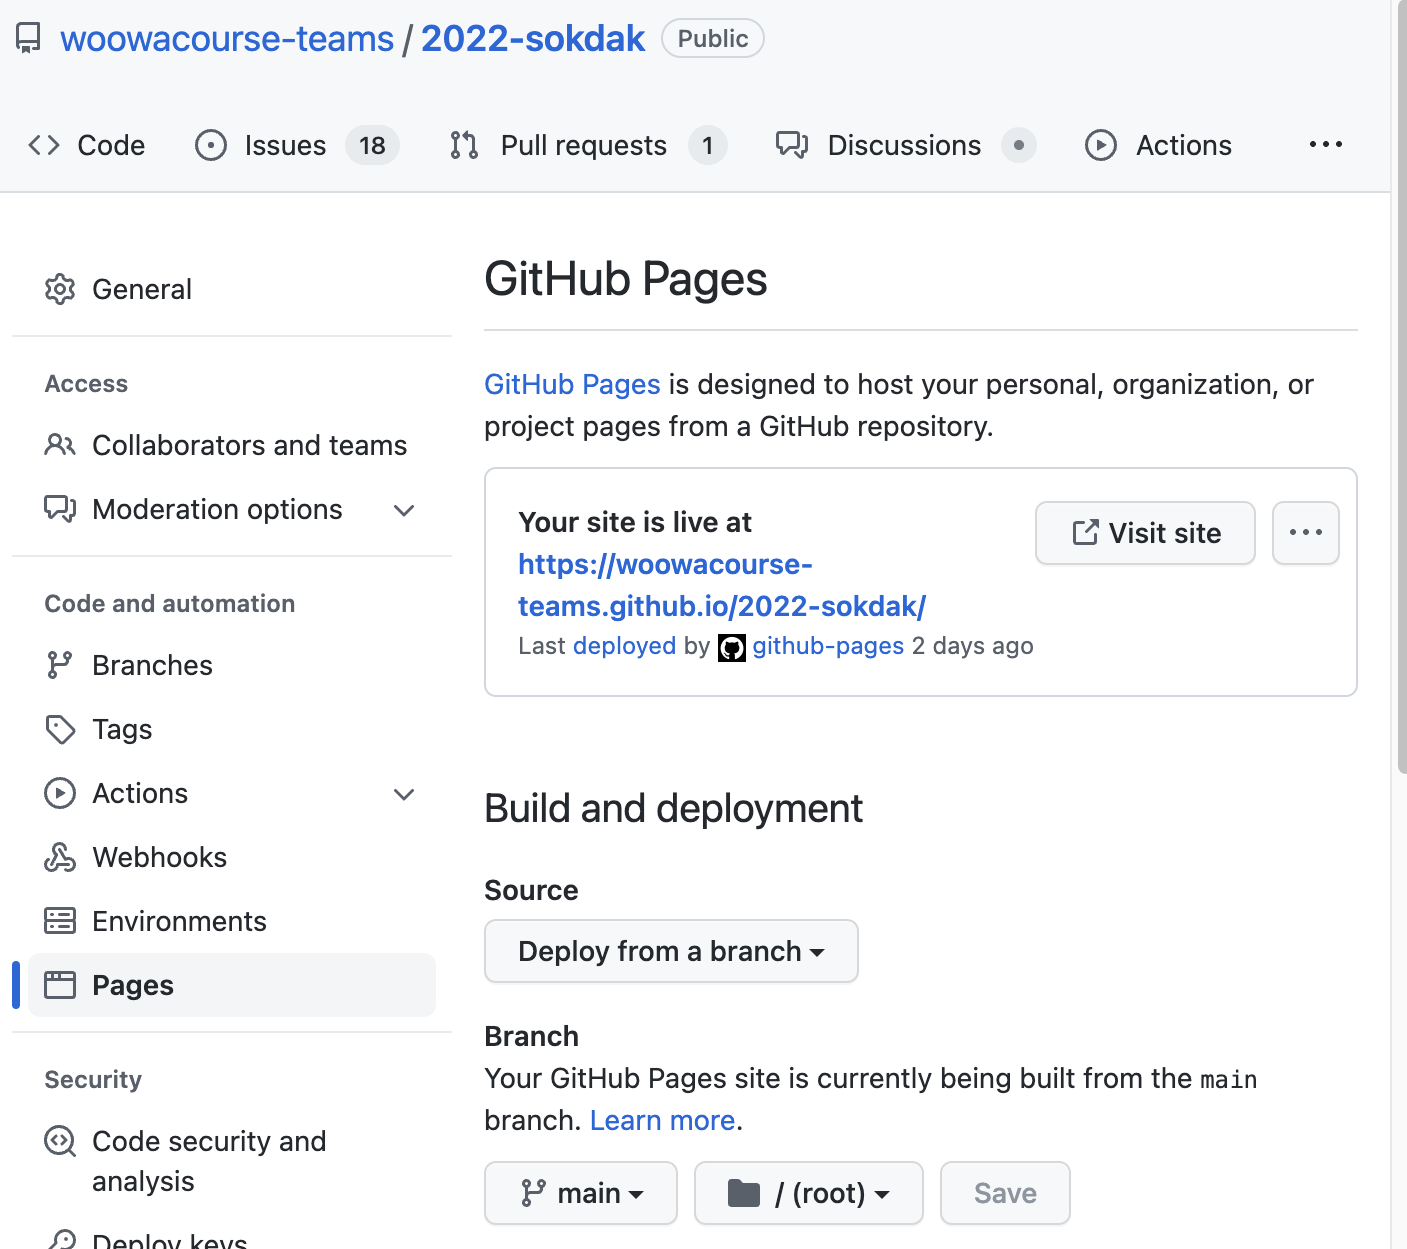
Github Pages 좀더 편하게 API 문서를 보기 위해 github pages를 이용합니다.
이때
- main 브랜치로 활성화하면 main 브랜치 속 index.html로
- dev 브랜치로 활성화하면 dev 브랜치 속 index.html로
접근 가능합니다.
현재는 dev 브랜치로 설정해두었습니다.
결과
이제
https://woowacourse-teams.github.io/2022-sokdak/
속닥속닥
말하기 힘들었던 이야기들을 익명의 힘을 빌려 자유롭게 꺼낼 수 있는 우리만의 대나무숲, 속닥속닥
woowacourse-teams.github.io
로 들어갈 시

README.md 가 뜹니다.
링크를 클릭 시

API 명세 언제 어디서나 해당 링크로 API 명세를 볼 수 있습니다.
개발자 뿐 아니라 유저들도 해당 API 문서에 접근 가능합니다.
created by 헌치